MAC Filteration is a special secuity and access control method through which the access of the device(s) to a network connection is determined by the MAC Address of the device. MAC Address is a 48-bit address that is assigned to the network card of each device.
MAC Filtering helps in allowing or denying different devices the connection to the network. It helps to prevent unwanted access to your network and also protects your router from potential hackers. Through MAC Filtering, we can whitelist or blacklist different devices by their MAC Address and those devices will then be able to or not able to join your network. Generally, people prefer using the Whitelist method in which the selected devices are granted access to the network while the other are prevented from access your network.
How To Filter MAC Address in TP-Link?
Turning on the MAC Address filtration on your TP-Link Router isn’t that difficult as you think it would. The process is relatively simple and easy. You can follow this short guide below to enable MAC filtration and filter devices on the basis of their MAC Addresses.
- Open a web browser.
- In the address bar, type http://tplinkwifi.net or default IP address i.e 192.168.0.1 or 192.168.1.1 and press Enter.
- A login page will appear asking you to enter the login username and password to continue. The default username and password for TP-Link routers is admin.
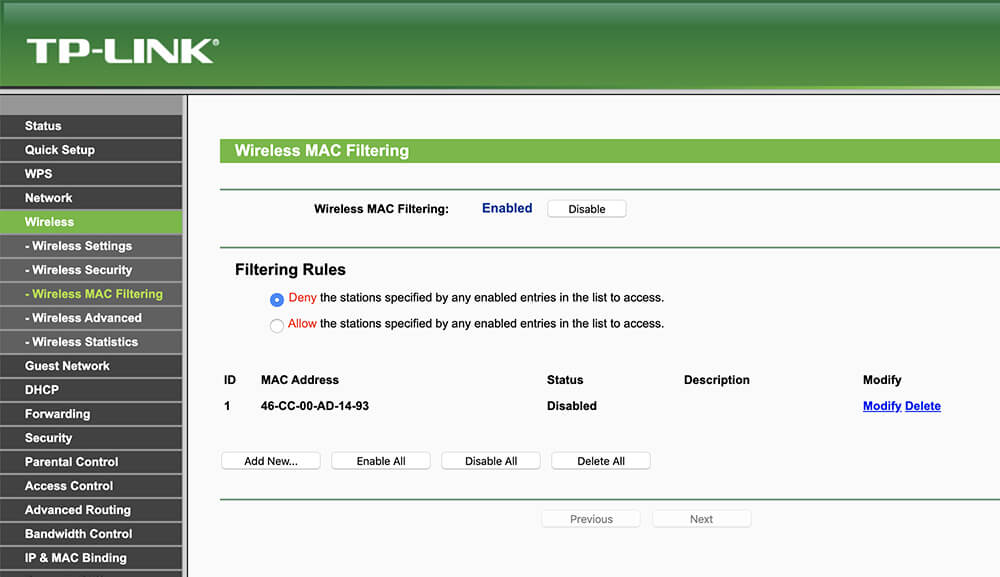
- Once you log in and are on the main page, go to Wireless > Wireless MAC Filtering.
- Click on the Enable button next to the Wireless MAC Filtering option to enable it.
- Click on the Add New button.
- Enter the MAC Address for the device for which you wish you enable MAC Filteration.
- Also, write a description for the MAC Address e.g Home PC.
- In the status option, make sure that you set it to enabled.
- Click on Save.
- Select the filtering rule, whether to Allow or Deny the specified addresses.
- Allow: Allow the enlisted MAC Addresses and deny the rest.
- Deny: Deny the enlisted MAC Addresses and allow the rest.

