
A guest network is creating a separate access point on your network to which other people including your friends and acquaintances can connect. It is a separate access point, one different from your home network. Guest Network is a win-win solution, your guests don’t lose access to the internet and the real home network to which all of your devices are connected doesn’t get compromised.
The reason why you need a guest network in the first place is to prevent your data and information on the network from being compromised. If someone connected to your actual home network and they download a malicious file or program or their phone is already infected then they can not only spread the malware and virus across the network to other devices but can also comprise the information that is being shared across the network and this may include sensitive information such as online banking details.
So to let your guests access the internet and prevent your connection from being compromised, you need a guest network. A guest network allows visitors and guests in your home to use the internet without them having to connect to your main, private network. Guest networks only have access to the internet only and not any other resources that are shared on the main network. This ensures security and privacy and of the main network.
Setting up a guest network is a lot easier than it may actually sound. Some people might think that they need to lay extra cables or pay their ISP for an additional network but that isn’t the case. All you need to do is to enable it from the Admin Panel of your router and you’re good to go.
From the Admin Panel, you need to configure the guest network such as the SSID, password, etc and after that, the guest network will be set up.
How to set up a Guest Network on TP-Link?
Follow these steps to learn how you can set up a guest network on your TP-Link Router:
- First, connect your PC/Laptop to the router, wirelessly, or using a LAN cable.
- Now, log in to the admin panel of the router through 192.168.1.1 or tplinkwifi.net using the default login username and password. (The default username and password For TP-Link devices is admin.)
- Once logged in, go Advanced > Guest Network.
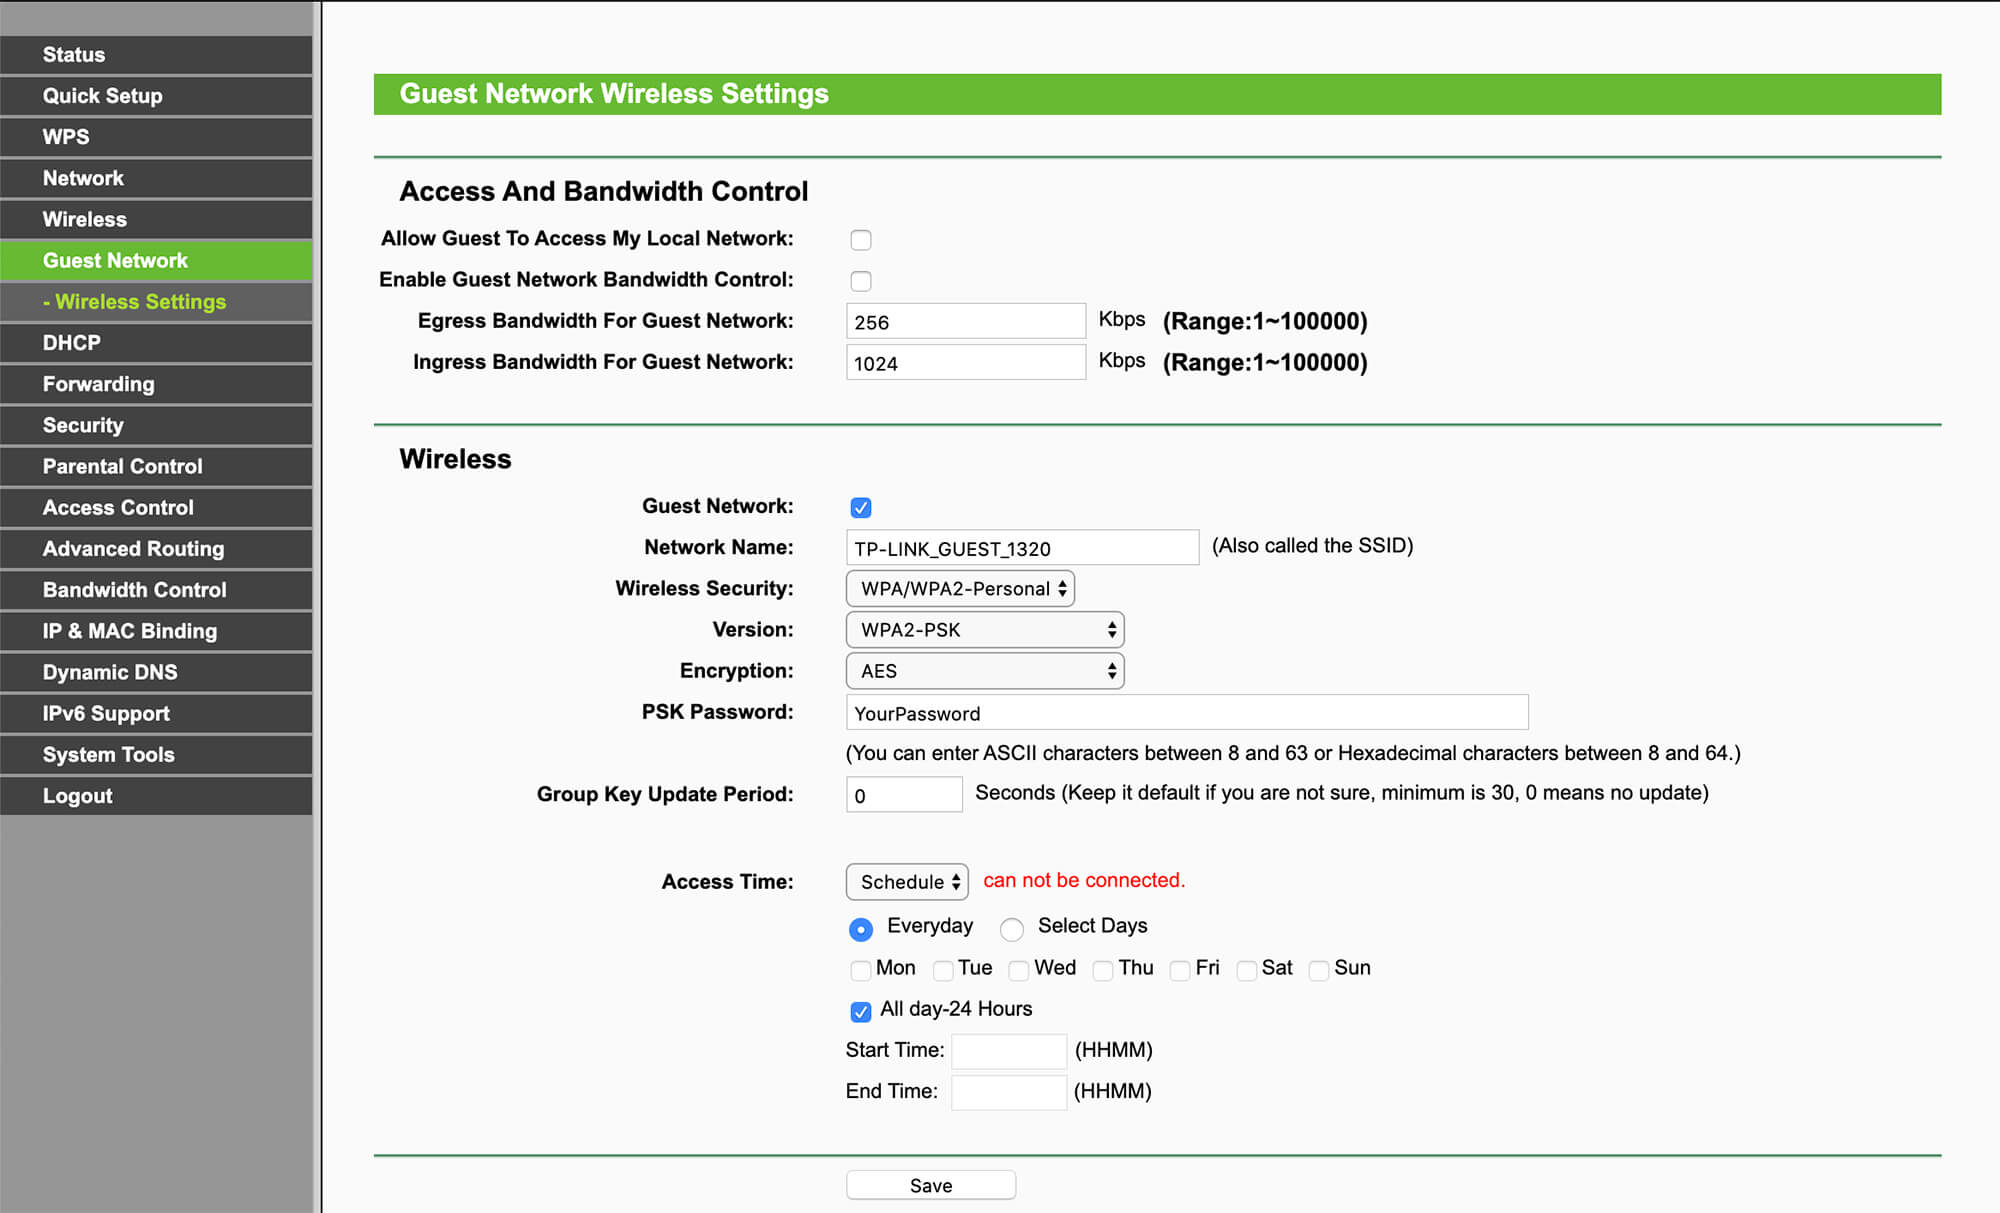
- Scroll down and locate the Wireless section.
- Now, select the frequency band, either 2.4 GHz or 5 GHz.
- Click on the Enable Guest Network checkbox to enable it.
- Enter the SSID or name for the Guest Network.
- If you want to hide SSID and want guests to manually enter the SSID then you can select the Hide SSID box, otherwise, don’t select Hide SSID.
- If you don’t want any encryption then select No Security otherwise select WPA/WPA2 Personal.
- Keep both the Version and Encryption to Auto and now, enter your desired password in the given field.
- Click on Save. Now, guests will be able to join the newly created guest network using the password that you set.
- To view the status and information of the guest network, go to Advanced > Status > Guest Network.
How to set up a Guest Network on D-Link?
Follow these steps to learn how you can set up a guest network on your D-Link Router:
- Make sure that you are connected to the D-Link Router. Log in to the Admin Panel of the router through 192.168.0.1 or 192.168.1.1.
- Log in using the default username and password. (The default username is admin and the default password is a blank field)
- Once logged in, go to Settings > Wireless > Guest Zone.
- Enable the Guest Network by sliding the Status bar to Enabled.
- Now, enter an SSID for your Guest Network and a secure passphrase.
- To prevent guest devices from being able to detect or communicate with other devices on the network, enable the Internet Access Only option.
- Click on Save Settings to finalize the process.
How to set up a Guest Network on NETGEAR?
Here is how you can set up a guest network on your NETGEAR Router:
- Connect to the NETGEAR network and log in to the router’s admin panel through http://www.routerlogin.net.
- Enter the login username and password to continue. (The default username for NETGEAR routers is admin and the default password is password.)
- Once logged in, go to the Basic tab and select Guest Network.
- Scroll down to Wireless Network 2.4 GHz or Wireless Network 5 GHz section(depending on the frequency band you want to set) and click on the Enable Guest Network checkbox to enable the guest network.
- Also, mark the Enable SSID Broadcast checkbox.
- Make sure that Allow guests to see each other and access my local network is not checked to prevent guests from accessing your local network.
- Enter an SSID for your Guest Network.
- Select your security/encryption protocol and enter a secure passphrase.
- Now, click on Apply to save the settings.
Keep in mind that when you are setting up a guest network then you set up a strong and secure password because when you are doing so much to protect your network then adding a secure password won’t hurt. The advantage of setting a secure password for the guest network is that this will prevent any unauthorized access even to your guest network. So, no one will be able to use your internet without your consent, even on a guest network.